The following steps will teach how to setup your Cloud Heroes Hosted Exchange account with Outlook 2013.
Step 1 – Open Outlook
If this is the first time you have used Outlook, the programme will walk you through the following stages. Otherwise, click FILE, then Add Account.
Step 2 – Add Account
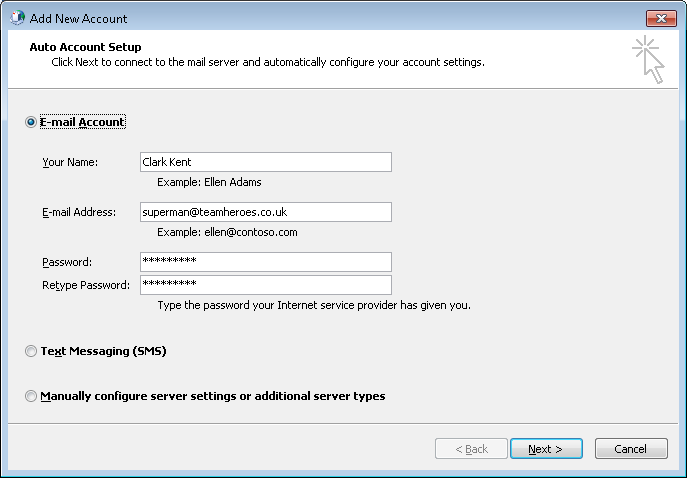
On the Add Account dialog that appears, you are going to want to fill out the following information.
Your Name: This is the name you would like to appear to anyone that receives an email. It might be your own name or the name of your company or department, it’s up to you.
Email Address: The address provided for you by Cloud Heroes and will follow the formatname@yourdomain.co.uk or similar.
Password: Provided for you by Cloud Heroes.

Once you have filled out all of this information, your screen should look something like the below. Click Next.
Step 3 – Automatic Setup
If everything has been setup correctly, Outlook should automatically proceed to setup your account for you.

If everything goes through ok, you should see the screen below.

To start using your account, click Finish.


